Adventures in Rhubarb

After Memorial Day weekend was over and the beaches were empty and the streets were clear, my Mom and I decided to take a stroll. It was a bright and sunny day, and the neighborhood was quiet and peaceful. We came upon this sign.

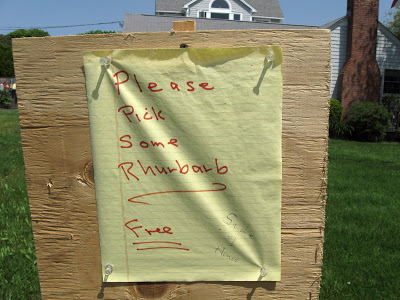
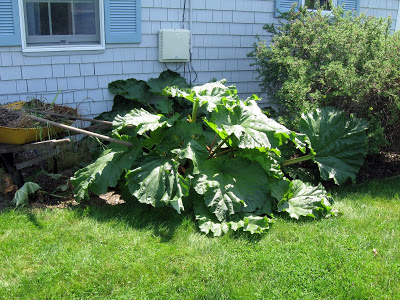
“Please pick some rhubarb.” And they say New Englanders aren’t friendly… But wait a minute, what does a rhubarb plant look like? We trekked across the lawn to the side of the house as directed and poked around. Oh look, there it is!

See the rhubarb on the inside of the plant?

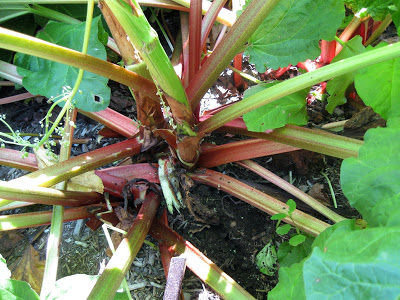
Now that we found the rhubarb, we had to figure out how to harvest it. There were a few garden tools left in the wheelbarrow nearby. I got to work and my Mom took pictures.

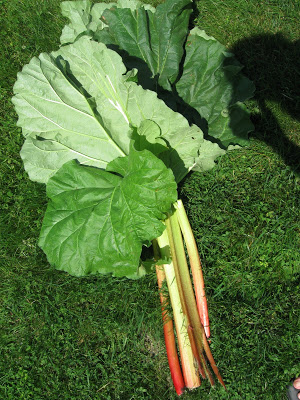
Our modest rhubarb harvest consisted of 4 stalks. The plant was large, but we didn’t want to be greedy, and we actually had no idea what we were going to cook. I had used rhubarb just once before in a chutney.

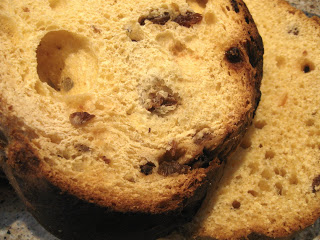
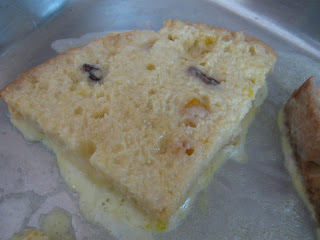
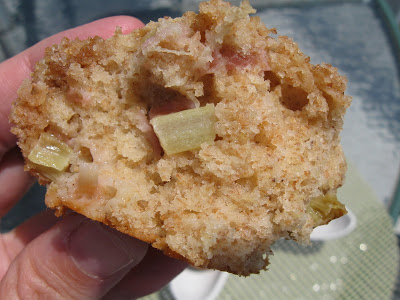
One of the first places to go for unique recipes is Smitten Kitchen, and she had recently posted this recipe for rhubarb muffins. We had all the ingredients on hand, and immediately got to baking. The recipe is fairly straightforward, and includes a streusel topping. The sweet mixture of brown sugar and butter perfectly balances the tart flavor of the rhubarb. We made up a dish of muffins, and then went outside to sit on the deck and enjoy the fruits of our labor.

It was a great opportunity to pick produce practically in our backyard and then immediately use it to create something delicious. You can actually see the chunks of rhubarb in the muffins. This is the real definition of local food, and I hope to experience more of these opportunities soon.

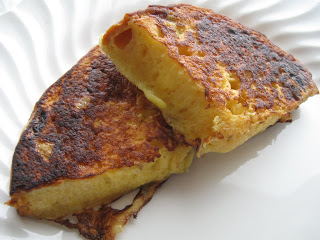
Thanks to the neighbors who generously put up the sign offering the rhubarb! We used the remaining stalks for another project, but I’ll save the rest of the adventures in rhubarb for another post.

Mild Coconut Curry

My cooking club theme this month was Malaysian, so we gathered last Sunday for a Malaysian feast! We had Shrimp Pad Thai, (Not too) Spicy Chicken, and this coconut curry. Of course, we drank lovely wine with our meal and then had some delicious rice pudding for dessert.

This dish was based on a recipe for Mild Coconut Tofu Curry. I wanted the curry to be flavorful, but not too spicy. Since we were already having shrimp and chicken, I skipped the tofu. One recipe review suggested adding pea pods, which ended up being great for color and variety.

The most challenging ingredient here was the lemongrass. I found it in the store, but wasn’t sure how to use it. I kept peeling the green leaves until I got to a thin yellow stalk on the inside which is the part I used in the dish. That’s what Google said to do, but I have no idea if that’s right or not. The lemongrass did have a great scent, and it was fun to try something new.

The curry ended up with more kick than I expected, but the dominant flavor was really the ginger. I liked the combination of potatoes and pea pods, and this dish held over very well for leftovers the next day. Most of us like cooking club because it challenges us to try new dishes, and this was no exception. I just may need to find another recipe which uses lemongrass….

2 T garlic ginger paste
1/4 c. cashews
2 stalks lemongrass, peeled and cut into small pieces
2 small onions, peeled and cut into chunks
1 T canola oil
2 T curry
Dash red pepper
2 c. pea pods
1 (14 oz.) can light coconut milk
3-4 potatoes, peeled and cubed

In a food processor, combine garlic ginger paste, cashews, lemongrass, and onions. Pulse until well blended. Heat oil in a large frying pan. Add mixture to the pan, and then stir in curry and red pepper. Cook for 3-5 minutes. Add pea pods, and stir fry for 3 minutes. Add coconut milk and potatoes. Bring to a boil, reduce heat, and cook covered for 30 minutes, stirring occasionally.

Roasted Peppers on the Grill

You can buy roasted red peppers in a jar, but it’s a lot more fun (and economical) to make them yourself. And roasted cubanelles are a bonus! Here’s a step-by-step guide.

First, gather your peppers. For this project, we used 6 large red peppers and 6 cubanelle peppers. (When I say “we” in this post, I use the term loosely. My Dad did all the work here, I just took pictures.)

Prepare a foil tray by adding a small amount of olive oil and relish. Place the tray on the grill, and add the cubanelles.

The red peppers are placed directly on the grill, and then brushed with olive oil.

Cook on medium-high, lifting the grill cover to turn the peppers occasionally. When the cubanelles are done, they can be placed directly on a serving plate.

Once the red peppers are nicely grilled, they require a few more steps.

The secret to success is a brown paper bag. I know, with the increasing popularity of reusable shopping bags (a wonderful thing!) you may have to hunt around the house for a paper one. Take the peppers directly from the grill and place them in the bag. Fold the bag over and let the peppers steam for about 1 hour.

Remove the peppers from the bag, and you will be able to peel the skin easily. The peppers can then be sliced open, and they are ready to serve!

Your very own roasted red peppers, which make the perfect topping to any kind of burger.

Yogurt Popsicles

Looking for a cool summer time treat? My nephew got to have his very first homemade popsicle last weekend! My sister purchased the molds at a discount store, but they are similar to these KidCo Frozen Treat Trays. She filled them with Stonyfield Farm Whole Milk Strawberry yogurt which made a great tasting popsicle. Well, I thought so…he was a little uncertain about the popsicle at first but got the hang of it just as it started to drip.

My nephew is not yet two and therefore still enjoys whole milk products, but I am curious to see if fat free yogurt can make popsicles for big people too!

Pannetone French Toast

The day after the Pad Thai experiment, my sister took charge of breakfast. She had been given a loaf of Pannetone, an Italian sweet bread, and decided to use it to make French toast. A very rich breakfast indeed, but if it’s good enough for Giada, it’s good enough for us!

The Pannetone is sliced, and then soaked in a mixture of eggs, cream, milk, and sugar. The slices are cooked in butter on a griddle or frying pan until golden brown.

The recipe called for a garnish of mascarpone and powdered sugar, but we went with fresh fruit (not pictured here.) While this French toast made a nice breakfast, we all agreed that it fell short of amazing. Given the fact that it’s most certainly a ‘special occasion’ meal, we’ll keep looking for new options.

Vegetarian Pad Thai

Yes, we did some traditional grilling on Memorial Day weekend, but I also like to take the time on long weekends with my family to make dishes which require more effort. Remember the last time I tried Pad Thai? It’s so much easier to tackle a complex dish when there are extra sets of hands around. When I first suggested Pad Thai, only my sister was actually familiar with the dish but she liked it and figured the others would too.

My starting point was this Vegetarian Pad Thai recipe, which I chose because it used baby bok choy to bulk up the dish with vegetables. When cooking for a group, there’s always a trade off between keeping a dish authentic and trying to make sure everyone gets a satisfying dinner. I chose a vegetarian recipe since the fish sauce used in many traditional recipes can be somewhat strong. Taking into account other individual preferences, I traded in the cilantro for basil, skipped the bean sprouts, and increased the amount of baby bok choy. I also swapped out a portion of the oil for vegetable stock.
After garnishing the noodles with ground peanuts, chopped basil, sliced scallions, and grilled marinated shrimp (this will make the dish non-vegetarian obviously), it was ready to enjoy. This was much nicer than anything I’ve eaten out of a foil take-out box! The chilies added more heat than I expected, but it wasn’t too hot. The noodles were cooked perfectly this time and the bok choy added plenty of color. In the end, the dish was a complete success, and my family has decided they like Pad Thai.

16 oz. rice noodles
4 eggs, beaten
2 T minced garlic
2 shallots, sliced thinly
10 heads baby bok choy, roughly chopped
4 scallions, sliced
1/2 c. chopped basil
1/2 c. ground peanuts
1 1/2 T tamarind paste
1/2 c. hot water
1/2 c. low sodium soy sauce
2 red chilies, minced
6 T brown sugar
2 T canola oil
1/2 c. vegetable stock
4 limes, quartered
First, make the sauce. Dissolve the tamarind paste in hot water. Add the soy sauce, minced chilies, and brown sugar, and mix well. Set aside.
Then, assemble the garnish ingredients on a plate including the scallions, basil, peanuts, and limes and set aside.
Bring a pot of water to boil, then remove from the heat and soak the rice noodles for 6-7 minutes. Drain and rinse with cold water.
Once you have all the ingredients chopped and ready, heat the oil in a large frying pan. Add garlic and shallot, and stir fry for 2-3 minutes. Add the bok choy and the vegetable stock, and stir fry for 3-5 minutes. Make a well in the center of the pan, and add the beaten eggs. Cook eggs until scrambled and then distribute the eggs throughout the pan. Add the drained noodles and the prepared sauce, and stir fry everything together for 3-5 minutes.
Note: The recipe as posted is an excellent vegetarian dish. If you choose to top it with grilled shrimp, it is no longer vegetarian. I chose to include this option which may be appealing to some readers. Sorry for any confusion.

Grilled Shrimp

Memorial Day weekend is the perfect time to break out the grill, and one of the things we grilled were these marinated shrimp. I scouted out some marinade recipes, but ended up creating my own using some of the ingredients we had on hand for other dishes we made over the weekend. Of course, I tossed in some white wine which is always a good addition to any marinade!

The shrimp were good, but just slightly overcooked. It’s so tough to pinpoint the exact moment they’re done. But they certainly looked pretty and had a good flavor which complemented our main dish of the evening, Pad Thai. More on that next week!

1 lb. raw shrimp, peeled
2 T canola oil
1/4 c. white wine
Juice of one lemon
1 bunch scallions, thinly sliced
1/2 c. chopped parsley
1 T minced garlic
Dash of dried basil
Dash of salt
Dash of pepper

Mix marinade ingredients in a large glass bowl, and place shrimp in bowl. Refrigerate for 3-6 hours. Grill in a basket for 5 minutes, or until pink.

Baked Eggs with Spinach and Tomatoes

A balanced breakfast should include a variety of foods, so to accompany the wheat bagels I made this casserole from Real Simple. The base of the dish includes sauteed spinach and tomatoes which are held together with egg whites. The egg yolks are gently placed on the top, and then the entire casserole is baked for 20 minutes.

I am a huge spinach fan, so I used two (10 oz.) packages of frozen spinach instead of one pound of fresh spinach as indicated in the recipe. The result was that there was way too much spinach, and it overwhelmed all the other ingredients. Plus, everyone agreed that this recipe needed some cheese. We added freshly grated Parmesan at the table, but next time I might add shredded cheddar cheese and let it melt in the oven. With just a few small changes, I am confident that this will be a super easy and delicious breakfast casserole.

Whole Wheat Bagels

Maybe you live in a place where you can easily run out on Sunday morning and get a great bagel. Maybe you even live in a place where they sell freshly baked whole wheat bagels. But even if you do, isn’t there something appealing about staying in your pajamas and enjoying whole wheat bagels right out of your own oven?

These bagels from King Arthur Flour aren’t 100% whole wheat, but use a blend of flours to achieve the right texture while including some whole grain. I used half all-purpose white flour and half whole wheat flour, but if you have higher protein baking flours on hand, go ahead and use them. Other than that, all you need is yeast, sugar, and salt.

The bulk of the work is done the night before, when the dough is mixed, kneaded, and allowed to rise. Then, you shape the dough and set the bagels in the refrigerator overnight.
When you wake up, the dough comes out of the refrigerator to warm up while you’re making coffee. Then after a quick boil and a short bake, breakfast is served. Yes, there are quite a few steps to create these bagels, but each step is fairly short and simple.
In the end, I think these bagels are worth it. The crust is golden brown, and the bagel has just the right amount of chew. These bagels had a large diameter but were fairly flat; if you’d like a higher bagel, be sure to shape the dough in a smaller circle. Next time I might even experiment with sesame seeds, poppy seeds, or maybe some cinnamon and raisins. Or maybe we’ll have a make your own bagel party – can your local bagel shop do that?

Exotic Mushroom Pizza

I am still enjoying the last bit of my extended Memorial Day weekend, but I borrowed a blogging machine so I could start sharing the recipes which we all enjoyed. On Friday night, I wanted a quick and easy meal to start the weekend. Pizza, of course! But this is no ordinary pizza, it was inspired by this Exotic Mushroom Pizza recipe, and contains two different kinds of mushrooms, two different kinds of cheese, and red wine. To balance out the rich pizza we served it with a simple green salad.

The mixture of onions, mushrooms, and red wine in the pizza filling was delicious, and we loved the melted Gorgonzola underneath the mushrooms and melted cheddar on top. Unfortunately, I spread the dough fairly thin, and the crust in the center of the pizza was overwhelmed and a bit soggy. It still tasted great (eaten with a knife and fork) but I would leave the dough thicker next time. It was fun to try a variety of fancier mushrooms, but for an everyday meal I think regular button mushrooms would be fine. Just don’t skip the wine….

1 lb. Trader Joe’s whole wheat pizza dough
1 T olive oil
1 T minced garlic
1 shallot, sliced thinly
1 red onion, sliced thinly
1/2 lb. cremini mushrooms, sliced
1/2 lb. shiitake mushrooms, sliced
1/4 c. red wine
1/2 c. crumbled Gorgonzola
1 1/2 c. shredded cheddar

Heat oil in a large frying pan over medium high heat. Saute garlic and shallots for 1 minute, being careful not to burn the garlic. Add sliced onions and saute for 5-10 minutes, until softened. Add mushrooms and cook for 10-15 minutes, or until most of the liquid has evaporated. Add wine and saute until evaporated, about 3-5 minutes. Remove from heat and season the mixture with salt and pepper.

Spread dough onto a cookie sheet coated with cooking spray. Sprinkle Gorgonzola on dough, and then spread mushroom mixture evenly. Sprinkle the cheddar cheese over the pizza. Bake at 425F for 15 minutes, or until the crust is golden brown.

Note: The original recipe recommended that the shiitake stems be removed and discarded. This seemed wasteful, and some quick Googling revealed that the stems are often quite tough and woody, but are not dangerous to eat. So I chopped the stems a bit smaller and threw them in. We noticed that some pieces of mushroom in the filling were firmer, but it did not detract at all from the meal.