Fall Salad

This salad was my first real bite of fall. I even tweeted about it! I hit the produce market on Saturday morning, and filled my basket: potatoes, sweet potatoes, an eggplant, two zucchini, green leaf lettuce, butternut squash, red onions, yellow onions, carrots, a tomato, an avocado, and apples.

When I came home, I decided to make this fresh fall salad. First, I cut some of the butternut squash to create 1/2 c. of small cubes. I tossed the cubes with a drizzle of olive oil, and baked them at 400F for about 20 minutes. Meanwhile, I cleaned some of the lettuce, chopped half of an apple, and about 1/3 of the avocado. When the squash was cooked, I tossed that in, and drizzled a balsamic vinaigrette on the salad. It was just about perfect.

Gerbs Pumpkin Seeds

I never expected to find my next product review at the Newport Irish Festival last weekend, but Gerbs Pumpkin Seeds was there offering free samples. We tried the kernels, both the ‘touch of salt’ variety and the ‘onion and garlic’ flavor. They were good! So we went back for the whole roasted seeds (not pictured), and they were good too!


Before you could sing “Whiskey in a Jar”, I purchased three varieties of pumpkin seeds to split with my family (the same people who spent hours chopping tomatoes!) The taste alone is enough to make me want to buy and eat them, but there are other benefits. First, they are a local (RI) company and are committed to environmentally friendly processing. They use no artificial ingredients; the ones that are salted contain only pumpkin seeds and salt. And pumpkin seeds themselves are quite nutritious as a source of protein, healthy fat, fiber, and several minerals.

So far, I’ve eaten them straight up as a snack, and tossed a few on salad. I am partial to the whole roasted seeds as they provide you with more to chew. My sister emailed me this week to report they were a good complement to her apple. If you’re looking for a new snack, I highly recommend you give these a try.

Really Homemade Tomato Sauce

I promised you three different options for tomato sauce, and we’ve covered the basic jar and a homemade tomato mushroom sauce. But this post is about really homemade tomato sauce. The kind where you start with a 25 lb. box of discount tomatoes and recruit your family to work together for hours in the kitchen. I swear, they’ll thank me when they pull a container of sauce out of the freezer on a cold December evening. In the meantime, they’ll have to settle for credit here.

Let’s start with the raw materials. The tomatoes came from a Rhode Island farm which sold them at a discount as ‘canning tomatoes’. I am guessing that we started with about 25 lb. of tomatoes, but there were a few truly rotten ones in the box that had to be thrown away. We also used 2 lbs. of onions, 2 carrots, 2 stalks of celery, 2 heads of garlic, olive oil, salt, and basil.

We tried to create a tomato processing assembly line. First, my Dad cut an X in the bottom of the tomato. Then, he dipped the tomato in a large pot of boiling water for 30 seconds, and placed it in a bowl of ice water. After this point, it was easy for me to peel the skin.

Here’s where things got a little tricky. We tried a few different ways to remove the seeds using a food mill, but ended up doing things the old fashioned way with knives and fingers. If you quarter the tomato once it’s peeled, you can remove most of the seeds with your fingers. Then you can chop the tomato pieces into one bowl (or a large pot, since we didn’t have a bowl big enough), and pour the tomato juices from the cutting board into a different bowl to be strained. This was the most time consuming part of the project, not to mention that the kitchen was covered in tomato juice at the end! But it was so much more fun than opening a can.

In the meantime, we heated up 1/2 c. of olive oil in a pan and sauteed the minced garlic and the chopped onion, carrot, and celery for about 15 minutes. Finally, we were ready to combine the vegetables, the chopped tomatoes, and a portion of the accumulated juice in a very large stockpot (not shown, but it was perhaps an 8-10 quart pot.)

We let it simmer for a long time on the stove, about 4- 5 hours. While the sauce was cooking, we added a glug of red wine, 3 T of salt, and chopped fresh basil. The sauce was still fairly thin, so I also added a can of tomato paste. We probably shouldn’t have added so much of the tomato juice into the pot, but another can or two of paste would easily fix this issue. In the end, our sauce wasn’t spicy (but you could add more pepper and oregano), it wasn’t sweet (but you could add sugar), and it wasn’t rich (but you could add more oil). The sauce did have the undeniable good taste of fresh tomatoes.
There is a certain sense of satisfaction that I get when I sit down to a really great meal cooked from scratch. There is also a sense of satisfaction in using fresh local ingredients, and stocking the freezer for the upcoming fall. You might argue that it is more economical to use canned tomatoes, but since fresh tomatoes are available now, this was a lot more fun. We all enjoyed a pasta dinner, and then divided the sauce into containers for the freezer so we can remember that crazy September day we spent turning a big box of tomatoes into a fresh sauce.

Zucchini Pasta with Tomato Mushroom Sauce

Now this is a homemade sauce! And what really makes it special is the zucchini pasta. Credit for the whole dish goes to this recipe from The Front Burner Blog. Defintely check it out, because Emily takes you through this step by step. Yes, you’re going to make zucchini ribbons and eat it like pasta. But let’s make the sauce first.

I used one yellow onion, 2 t of minced garlic, a 15 oz. can of mushrooms, and 3 fresh tomatoes. First, you saute the onions in some olive oil until they are soft. Then add the garlic, and then the mushrooms. Simmer until the liquid is evaporated, and then add in the tomatoes. I dipped the tomatoes in boiling water for a few seconds, and peeled the skins off first. Then I diced the tomatoes, and threw them in the pan. I cooked the sauce for quite a while – in fact, I cooked it so long that most of the liquid evaporated and it was too thick. So I added a can of Hunt’s Tomato Sauce at the end. It’s still homemade sauce, it just had a little help.

OK, on to the zucchini pasta. First, I peeled 3 large zucchini and tossed the skins. Then, I used the peeler to create zucchini ribbons, and I kept going until I hit the very seedy part. I had a lovely pile of green zucchini!

I sauteed the ribbons in olive oil for just a few minutes, and sprinkled them with salt and pepper. Then I topped them with the fresh tomato sauce and grated Parmesan, and dinner was served with a piece of foccacia bread. This was really a great dish, but I definitely went back for seconds. The zucchini pasta is delicious but not as filling as whole wheat pasta of course. So be sure to cook plenty!

Bertolli Arrabbiata Red Pasta Sauce

I am going to talk about three different tomato sauces this week, and the first is a very late product review of Bertolli’s Arrabbiata Sauce, flavored with red peppers. The reason this jar stuck around so long was because I am not really a fan of red peppers. So I had to wait until I could serve this pasta sauce to other people so it would get a fair review.

I tossed the sauce with whole wheat penne to keep this dish simple. I did sneak a taste myself, and I liked it more than I expected. The red pepper flavor wasn’t dominant; there was just a hint of spice. In fact, one taste tester thought the pasta sauce almost tasted sweet. Most people enjoyed their dish of pasta, but said they wouldn’t purchase this sauce. Sauce from a jar isn’t really popular in my crowd anyway. But I understand the appeal of the jar for a quick and easy dinner. Thanks to Bertolli for letting us try this one!

This sauce was provided to me as part of the Foodbuzz Tastemaker Program. I was not compensated in any other manner for the product review.

Zucchini Appetizers

My family has been making these zucchini appetizers for years. When zucchini is plentiful, these are easy to make and can either be served as an appetizer, or side dish, or even for breakfast! I found a lot of sources for the recipe, but am going to send you to good ‘ol Betty Crocker. We like to bake this in an 11×7 pan instead of a 13×9 so they are thicker.

No Bisquick in the house? No problem. Mix 1 c. flour, 1 1/2 t baking powder, and 1/4 t salt. Most Bisquick substitute also contain some source of fat, but since this recipe already contains oil, you don’t need it here.

These are somewhere between a bread and a quiche, but they really are delicious. Feel free to make your family nervous by perching them perilously on the deck to snap a picture before serving. Happy Labor Day!

Corn and Lobster Bisque

I think this is a fitting recipe to share heading into a long weekend, especially one that marks the unofficial end of summer. It was my sister who suggested that we make lobster bisque to serve with dinner. And so began a recipe search which led us to ask questions such as, “doesn’t bisque need to contain sherry?”, and “do we really have to use heavy cream?” This recipe, adapted from Emeril’s, seemed like a good compromise on all fronts, and also made use of some fresh corn.

We ended up using a mix of pricier lobster and less expensive crab, probably about 6-8 oz. total, and bulked up the soup with more onion and celery. We also used vegetable bouillon instead of fish stock. So while this wasn’t a pure lobster bisque, it was a good bowl of soup. One dinner guest gave this a big thumbs up, and my Dad said it was the best recipe we made all weekend. So there you have it – enjoy the long weekend!

Stuffed Zucchini Boats

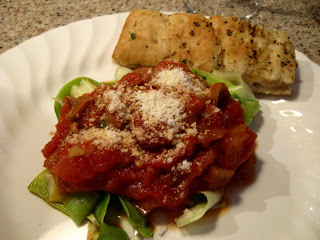
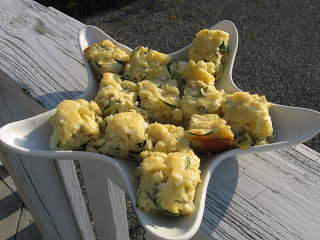
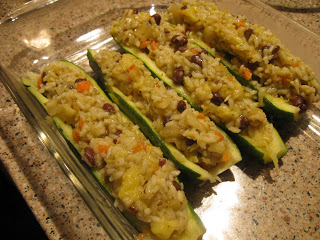
I have wanted to make this dish ever since reading about these ‘Pretty in the Pan Stuffed Patty Pan Squash’. I did find patty pan squash once at the farmer’s market, but regular zucchini is so much more common, and I figured boats would be just as fun. I loved the way that Angela made garlic infused rice as the base for the stuffing so I kept that aspect of the original recipe but changed a few of the other ingredients based on what I had on hand. This recipe looks long, and it does take about an hour from start to finish, but it is straightforward. So says the girl who had plenty of patience after bumming around all day. Here are the boats ready to go into the oven:

Everyone who tried these zucchini boats liked them. There was extra stuffing which I baked on the side of the boats, and that was good on it’s own. So if the idea of the boats doesn’t suit you, think of the stuffing as another summer side dish. I think the key is that the rice mixture was fairly wet, and didn’t dry out in the oven. By the time this is out of the oven, your dishes will all be done and you can just sit down and enjoy.
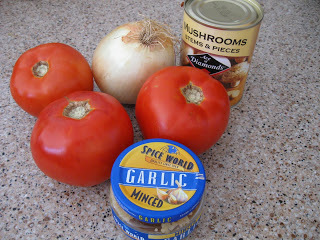
3 zucchini
2 c. vegetable broth
1 t minced garlic
Sea salt
1 c. rice
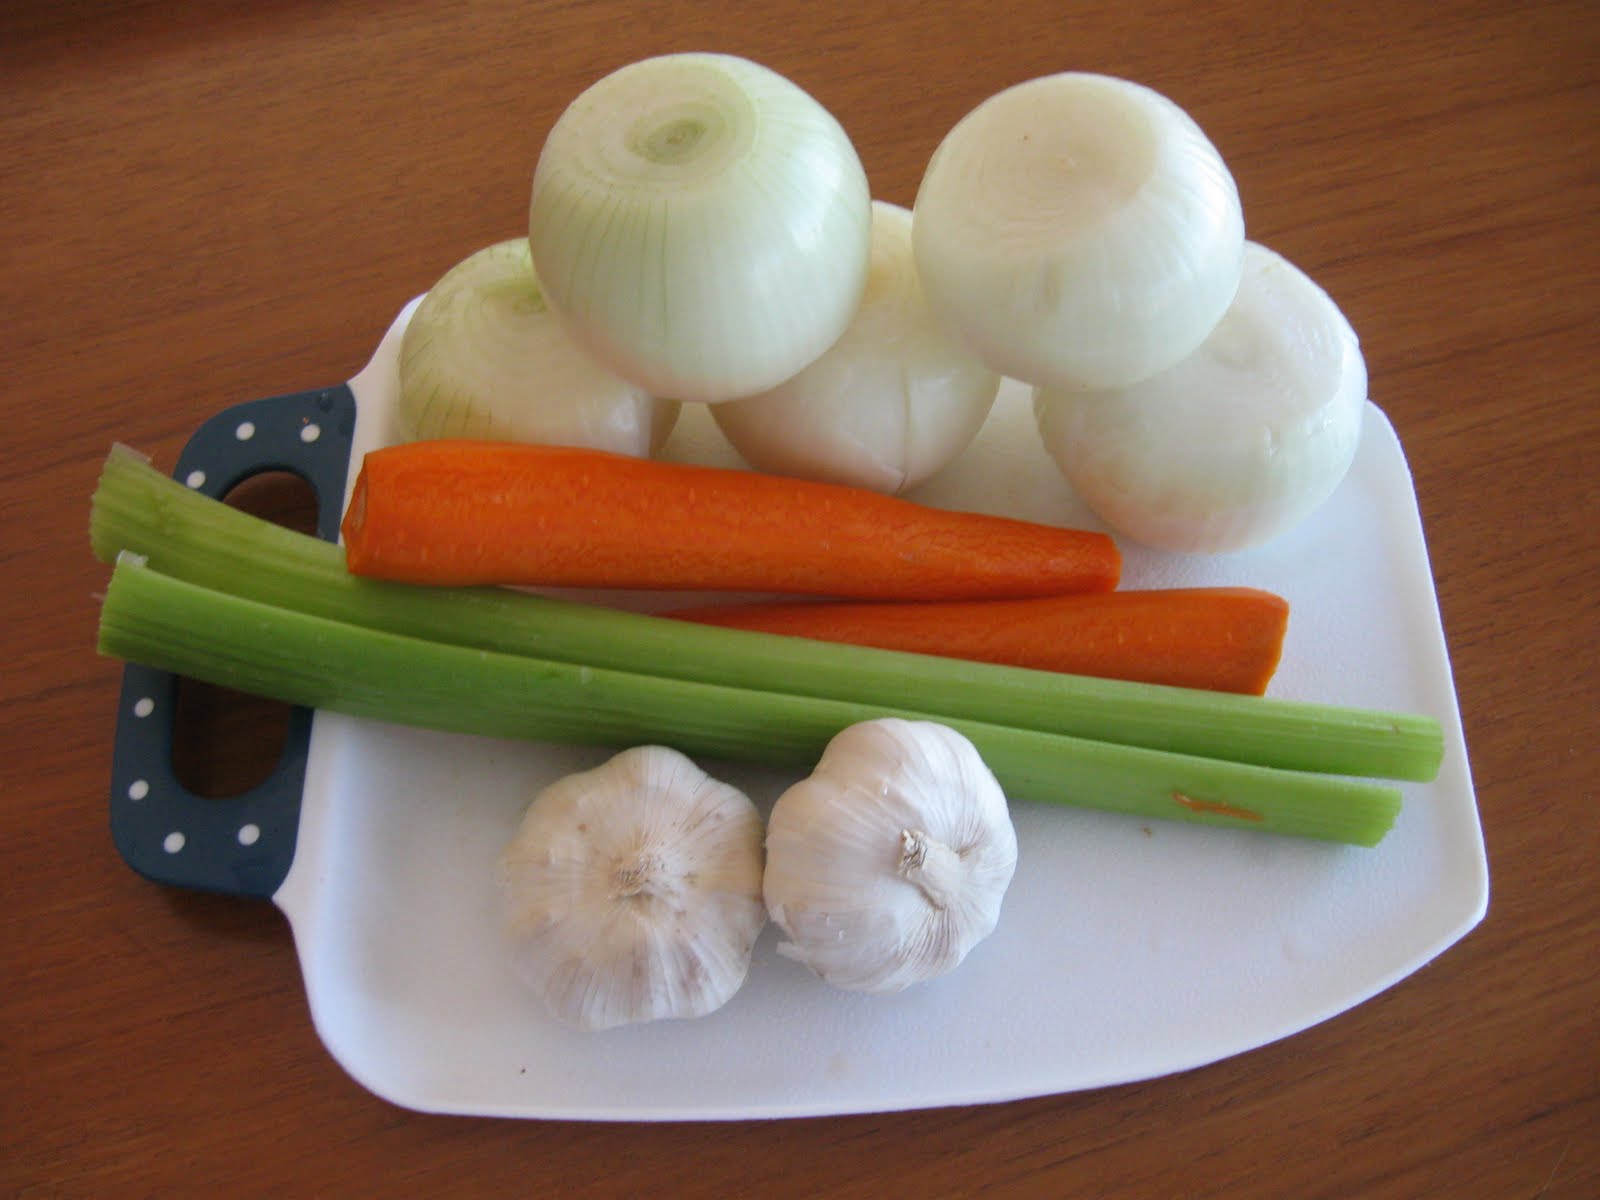
8 baby carrots, or 3 medium carrots
1 small onion
3/4 c. black beans
1 T butter or margarine
2 T pesto (I used Amore pesto paste, but you could substitute tomato for a different flavor and color)

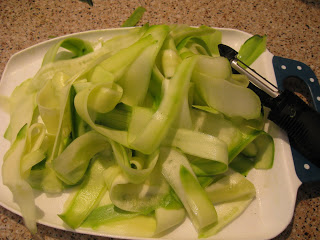
Cut zucchini in half lengthwise. Fill a large pot with 3-4″ of water, and bring to a boil. Simmer zucchini halves in the pot, covered, for about 5-7 minutes, or until softened. Remove from pot, and allow to cool. Scoop out the insides of the zucchini gently with a spoon. Mash the zucchini and set aside, and place the zucchini boats in a baking dish.

Bring vegetable broth, garlic, and a pinch of sea salt to a boil. Add rice, and simmer covered until cooked.

Place the mashed zucchini, carrots, and onion in the food processor and blend until finely chopped. (You can do this by hand, if you prefer.) Stir in the beans, butter or margarine, and pesto. When the rice is done, mix the vegetables and beans into the rice.

Stuff zucchini boats with the rice mixture, and bake at 375F for 20 minutes.

Homemade Crackers, Bandit Wine, and the Beach

This post includes a recipe, a product review, and a picnic at the beach. It was an action packed day!

The Crackers

You might ask the question – why make homemade crackers? When I told people about this project, just about everyone gave me a funny look. I like store-bought crackers as much as the next person, but even the healthiest options have some less than desirable ingredients. Plus, they can be rather expensive, while these crackers cost very little to make. And there’s a certain satisfaction in enjoying food you’ve made yourself. At the very least, you might file this recipe away for a day (VERY far away) when you’re snowed in without any crackers in the house, and need something crunchy for happy hour!

My Mom spotted this recipe from Smitten Kitchen which requires only a few ingredients, and purchased the spelt flour from the bulk bin of a natural foods store. I don’t think the type of flour you use is important – the key here is the toppings. We used sea salt (not pictured) and sesame seeds.

Rolling out the dough is a little tricky. My Mom is more adept with a rolling pin, so she was elected for this task. We could almost hear my grandmother saying “patience, patience” as it took several minutes of rolling to get the dough thin enough to cover the cookie sheet. But finally, the crackers were ready to go in the oven.


The final result? They were definitely crunchy, but tasted very plain. You really have to go all out on the toppings, and next time we’ll use some dried herbs as well. The basic concept gets high marks, we just need to execute it a bit differently.

The Product Review

My sister purchased this Bandit wine before the summer even started, but somehow did not get around to drinking it. I am pretty sure she picked it up for the convenience; the carton makes it easy to toss in your bag and go, but the packaging is also environmentally friendly. And most importantly, the wine was good. I can’t claim to be a wine expert, but if you’re looking for an easy way to enjoy wine in the great outdoors, this is a great option. (Don’t worry – I’ll replace the carton I stole!)

The Beach

The crackers and wine were put to good use for happy hour at the beach. It is so quiet there in the early evening; you can just sit back and relax and watch the waves roll in.

Basil Ricotta Pie

The ricotta stuffed French toast was more of an afterthought; the real purpose for having ricotta in the house was to make this basil ricotta pie. Yes, there is still plenty of basil on the plant, and in fact the recent rain seems to have fueled more growth. This is a super easy weeknight recipe, and makes a great dinner paired with a nice big salad. You’ll still have time to go out and catch the sunset.

However, the leftover pieces weren’t nearly as good, even when reheated in the toaster oven. I am not sure why, but the basil flavor seemed to lose it’s punch and the dough got a little tough. I’ll keep this in my recipe files for when company comes.

12 oz. pizza dough (such as from Trader Joe’s)
2 jumbo eggs, or 3 medium eggs, beaten
1 1/4 c. reduced fat ricotta
1 bunch scallions, sliced
1/3 c. chopped basil
Salt
Pepper
2 T freshly grated Parmesan cheese

Allow dough to rest on the counter for 30 minutes. Roll dough into a circle, and place into a 9″ springform pan coated with cooking spray.

In a bowl, mix eggs, ricotta, scallions, and basil, and add a dash of salt and pepper. Spread ricotta mixture on dough, and then sprinkle with Parmesan cheese. Bake at 375F for 30-40 minutes, until the top begins to brown.

-Adapted from Cooking Light